Cheddar & Bacon Monkey Bread Muffins

This recipe...was SO good. I wanted to post it up soon because it would make a great side dish to your Thanksgiving feast! Biscuit dough has always been a favorite of mine growing up, and the savory additions to this muffin made it so tasty!

I would just like to preface that this isn’t the most nourishing food, BUT it is part of MY food freedom that I’ve been experiencing, and definitely made for a tasty treat! This blog has healthy, wholesome recipes, and treat recipes, and I’ve come to a place where having foods like this doesn’t bother me or send me over the edge anymore. We have to learn how to nourish ourselves well so that we can enjoy the treats as well and not be so stressed around foo! I am so thankful for the food freedom and nourishment that I’ve been experiencing in this journey, and know that I am here to guide you through it as well, just reach out and we can chat! 


Anyways, onto zee recipe!  

FullSizeRender.jpg

These were super easy to whip up, and turned out so savory and delicious! I made a big batch since my hubby took them to work with him, but you could definitely cut the recipe down if need be!  


Cheddar & Bacon Monkey Bread Muffins

(makes 30-ish muffins) 


3 cans refrigerated biscuit dough

3 cups shredded cheddar-jack cheese mix

8-10 slices turkey bacon

1.5 tsp garlic powder

0.5 tsp onion powder

0.5 tsp sage

1.5 tsp thyme

0.25 tsp salt, or to taste  

1/2 cup butter, melted


Preheat the oven to 350 degrees. Then line a muffin tin with liners or parchment paper.  

First, chop the turkey bacon and fry them in a pan until they are crispy. Set aside to cool.

Then, open up the biscuits and cut into little cubes.  

IMAGE.JPG

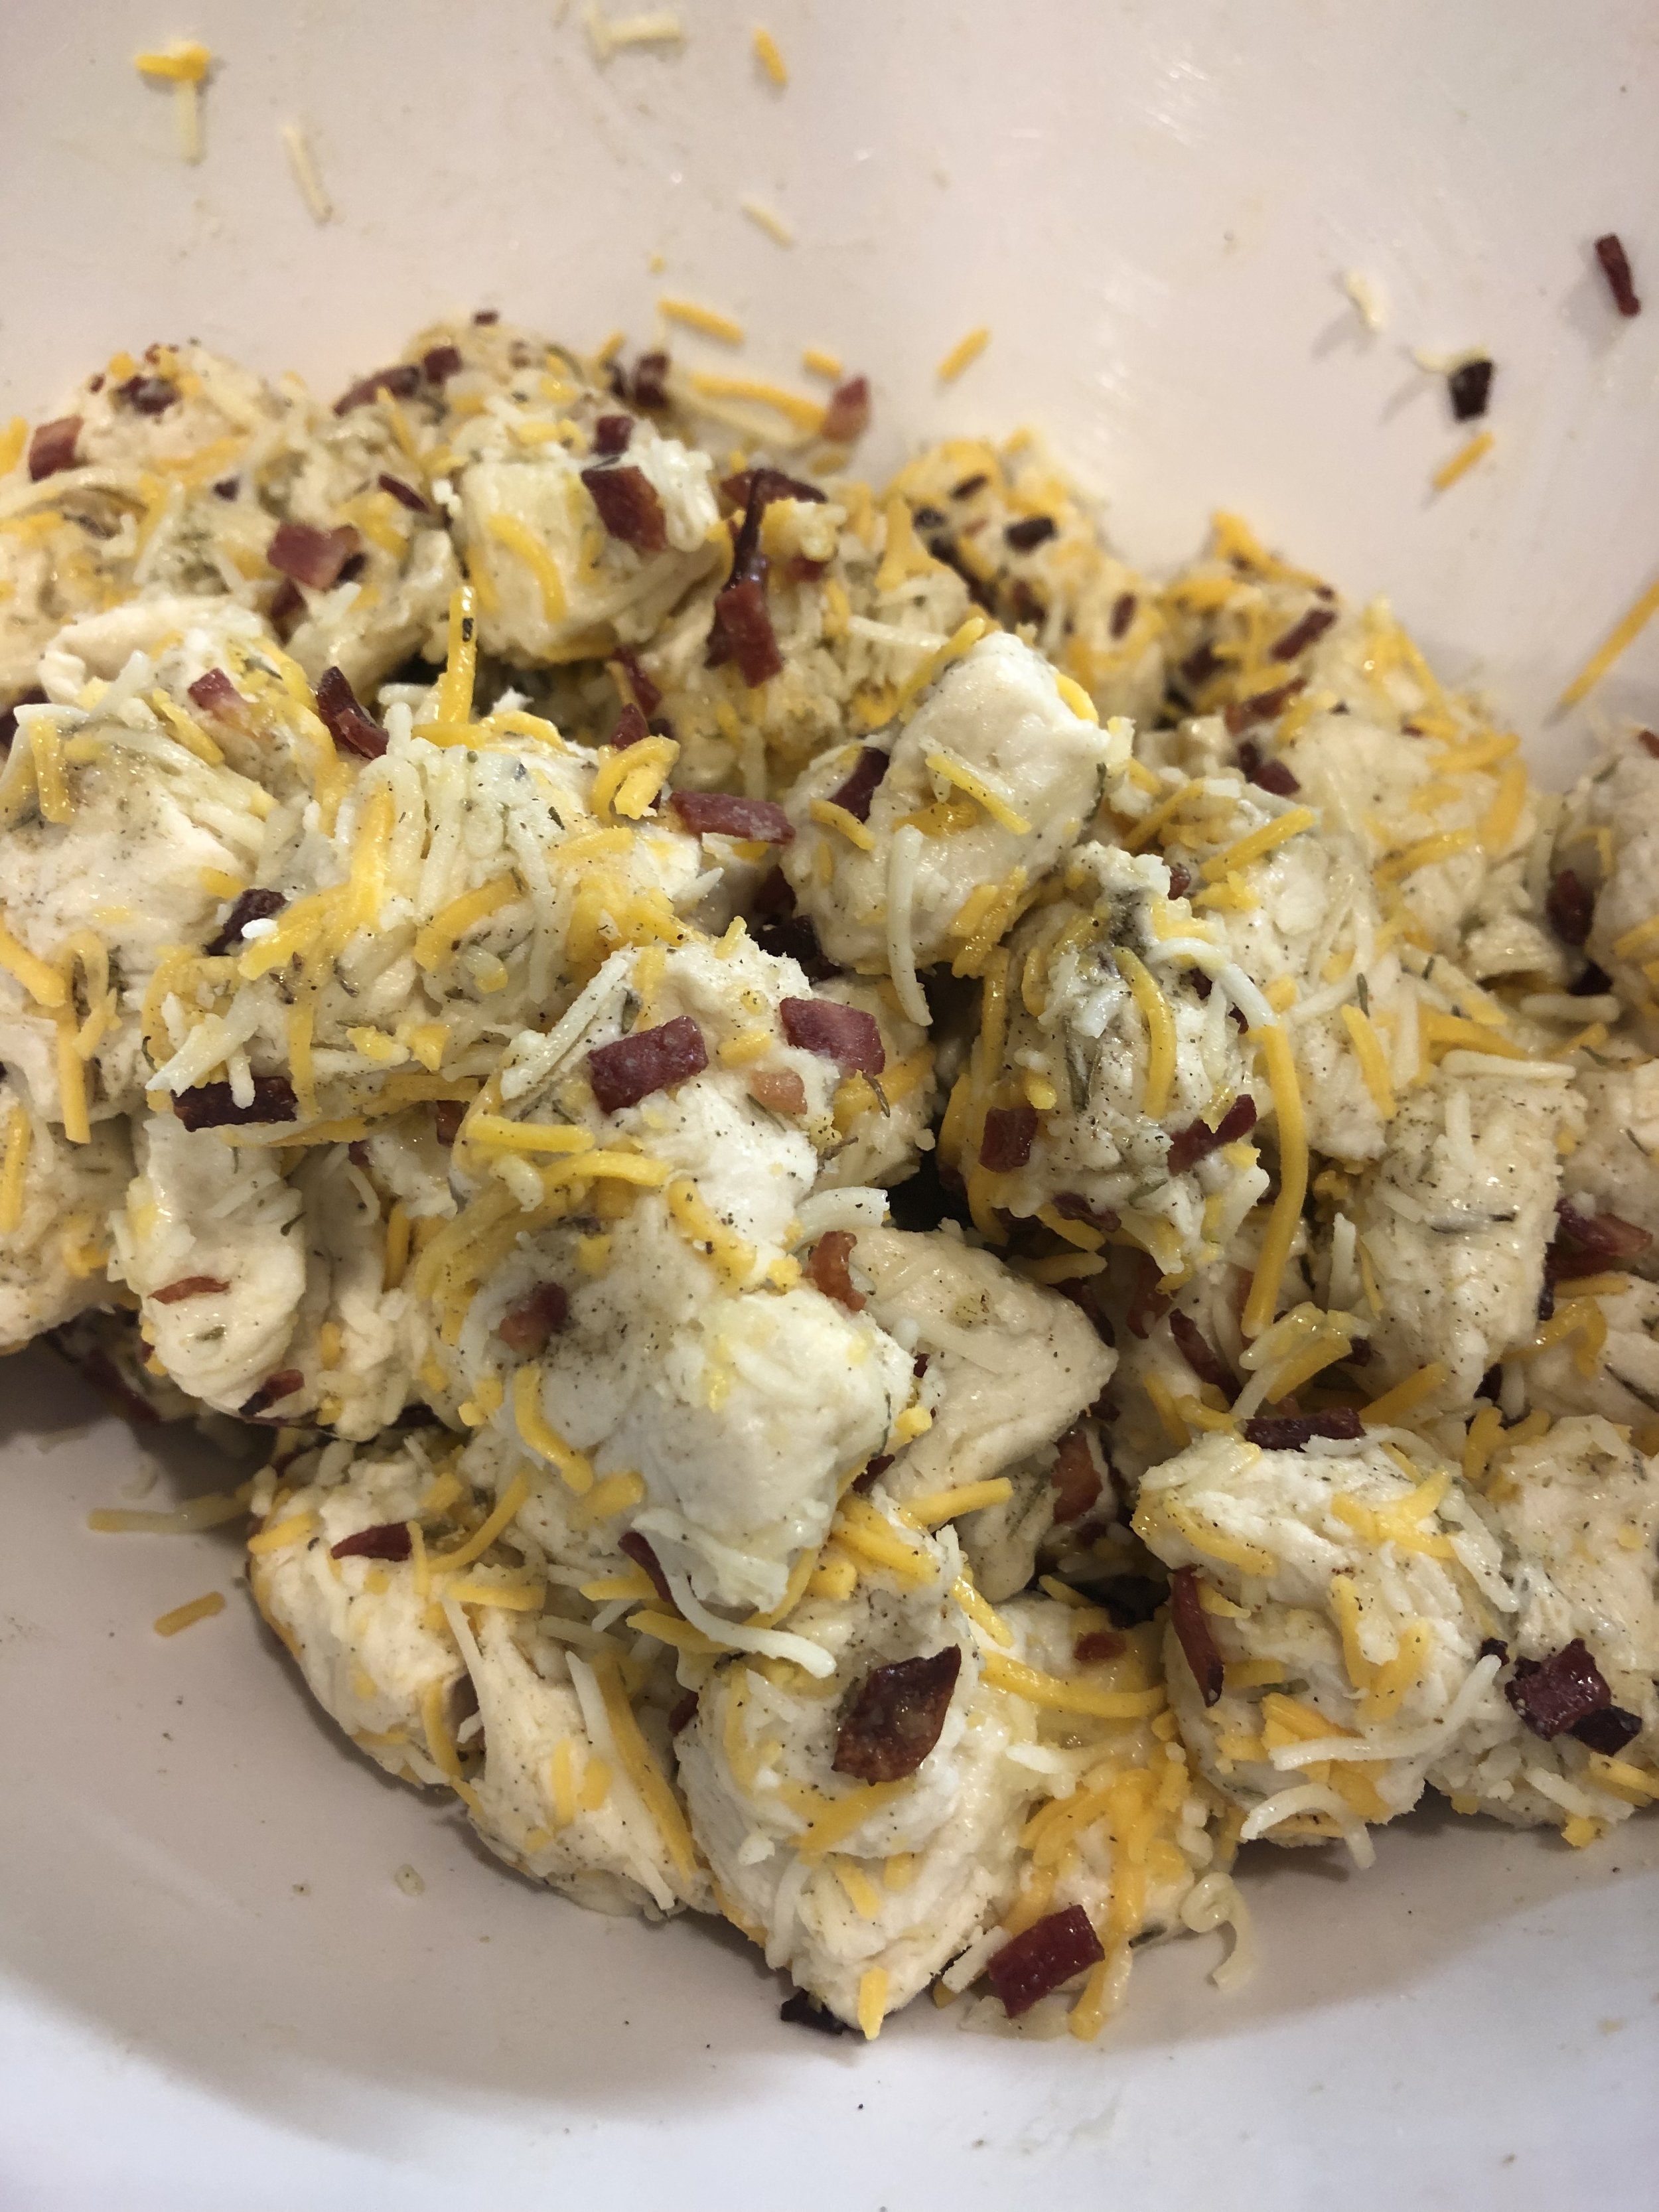
Place them in a large mixing bowl, then mix in the cheese, bacon, melted butter, and spices. Toss until the biscuits are evenly coated with all the yummy add-ins!  

IMAGE.JPG

Place about 5-6 cubes of the biscuits in each muffin tin. Then bake for 15-18 minutes or until the tops are golden brown.  

IMAGE.JPG

These were so gooey and delicious fresh out of the oven, but tasted great with breakfast this morning too!!  

Hope y’all enjoy and Happy early Thanksgiving!  

Apple Crumb Cake

I don’t know about you, but apple desserts have always been my favorite. Apple pie, apple crisp, apple muffins, I love them all. Pumpkin pie has nothing on apple pie in my opinion!  

With fall finally here and thanksgiving around the corner, I wanted to bake up a fall treat that would satisfy all of my apple dessert cravings! This apple crumb cake did NOT disappoint! And it was super easy to whip up! I baked it in a smaller Pyrex (because we are packing and that’s all I had) but I think if you doubled the recipe, it could fit into an 8x8 dish! 

FullSizeRender.jpg

Here’s the recipe!  

Filling:

2 cups chopped apples

3 T coconut sugar

1/2 tsp cinnamon

Juice of 1/2 lemon


Topping:

1/2 cup whole wheat flour

1/2 cup rolled oats

1/3 cup coconut sugar

1/4 water

1/4 cup grass fed butter, melted


FullSizeRender.jpg

Preheat the oven for 325 degrees.

Mix the filling and topping in two separate bowls.

Spray a glass dish with non-stick spray. Then pour the apple filling into the bottom of the dish and press down. Then press down the topping mixture evenly over the apples.

FullSizeRender.jpg

Bake for 25-30 mins or until it is golden on top and the apples are nice and soft. I even stuck a fork in there to make sure it was done since the top is more like a cake consistency. 


We let it cool for about 5 minutes before we dug in, with some vanilla ice cream of course! This dish was so simple and delicious; hope y’all enjoy it too! 

Pumpkin Snickerdoodles (the BEST!)

I think I did it. I think I made the BEST pumpkin snickerdoodles this morning, and I just had to share the recipe with you all! These taste like fall + Christmas + all the warm fuzzy things. They were pretty easy to whip up this morning and came out so chewy and delicious. Here is the recipe!

IMG_0529.jpg


Makes about 16-18 cookies

Wet ingredients:
1/2 cup unsalted butter, softened
1 whole egg
1/2 cup white sugar
1/4 cup coconut (or brown) sugar
1 tsp vanilla
1/4 cup pumpkin purée

Dry ingredients:
1.25 cups whole wheat flour
1/3 cup almond flour
1 tsp pumpkin spice
1/2 tsp cinnamon
1/2 tsp baking soda
1 tsp cream of tartar

Topping
1/4 cup white sugar
1 T cinnamon

Preheat your oven to 350 degrees and line a baking sheet with parchment paper.

Cream together the wet ingredients until smooth, then add in the dry ingredients. The dough will look a bit wet, but that’s ok!

Wrap the dough tightly in plastic wrap and store in freezer for at least 1 hr.

While you are waiting, combine the cinnamon and sugar for the topping.

Once the dough has set, take it out and roll into little balls, then roll in the topping mixture. Set on baking sheet with some room in between since these cookies spread!

Bake for 10-12 minutes or until the bottoms start browning. Then remove to cool!

These cookies were SO good, my hubby and I enjoyed them straight out of the oven as part of our breakfast...no guilt! I hope you all get to enjoy these cookies, let me know what you think!

Whole Wheat Banana Oat Muffins

Happy Friday, everyone! Have I got a recipe for you! I experimented this week and ​baked some delicious muffins at 5am because I was up and the brown bananas were just staring at me. I whipped these up in 10 minutes, did my workout while they baked, and viola, fresh baked muffins for breakfast!! We all have been enjoying them all week, especially smeared with some peanut butter! Hope y’all enjoy the recipe! 

FullSizeRender.jpg


Makes 12-15 muffins  

1.5 cups whole wheat flour 

1/4 cup rolled oats   

1/2 cup almond flour  

1 tsp baking soda  

1 tsp cinnamon  

1/4 tsp salt  

1/2 cup stevia of sugar equivalent  

1/3 cup coconut oil  

2 eggs  

3 brown bananas, mashed 

3/4 cup almond milk  

1 tsp vanilla extract  


Preheat your oven to 350 degrees and line your muffin tin. Mix the dry ingredients in one bowl and the wet in another, then mix together by adding the dry to the wet until incorporated!  

Pour the batter into the muffin tins, only till about 2/3 full. Bake for 22-25 mins or until a toothpick comes out clean!

I love having these as quick preworkout fuel, or with my breakfast as a side to some scrambled eggs/protein! 

IMG_0085.JPG

And since it’s the weekend, I highly recommend you make these muffins and enjoy them as well!! Happy Friday folks! 

Blueberry Muffins

Muffins are such an easy and delicious item to meal prep for your week! Breakfast is always a rush in our home as my husband and I are getting ready to head to work and take Emma to day care. These muffins have been our saving grace this week so I thought I’d share the recipe! 


FullSizeRender.jpg

Blueberry muffins (makes 10-12) 


1 cup oat flour

1 cup almond flour

1 cup unsweetened applesauce

2 eggs

1.5 tsp baking powder

1/2 tsp baking soda

1/4 tsp salt

1/2 cup coconut sugar

1/2 tsp vanilla extract

1 cup washed blueberries (fresh, not frozen) 


Preheat the oven to 350 degrees and line a muffin tin with liners (I have been using parchment paper liners and love them!) 

Mix all the ingredients except for the blueberries in a stand mixer or by hand. Then fold in the blueberries.

IMAGE.JPG

Pour about 1/4 cup of the mixture into each muffin liner. Then bake for 20-25 mins until a toothpick comes out clean! 

Emma and I enjoyed these fresh out of the oven. Every time I gave her a piece, she’d give me the sweetest smile! I hope you enjoy these as much as we did! 

IMG_6373.JPG

Strawberry Chocolate Chip Muffins (grain-free)

Hello everyone! I am so excited to share this recipe with you all. I baked these muffins Monday and they turned out so delicious, Emma and I have been snacking on them all week! Here’s the recipe! 

IMG_5633.PNG

Makes 12 muffins 

2.5 cups blanched almond flour 

2 T coconut flour  

1 tsp baking soda  

1 tsp baking powder  

3 eggs  

1/4 cup coconut oil

1/2 cup almond milk  

1/2 cup water  

1 tsp vanilla extract

8-12 stevia packets (or 1/2 cup sugar of choice)  

1 cup sliced strawberries  

1/4 cup mini chocolate chips  


IMG_5630.JPG

Preheat the oven to 350 degrees. Line or grease a cupcake tin so muffins don’t stick!

Mix all the ingredients together except for the berries and chocolate chips. Then fold in the berries and chocolate.

Pour the batter evenly into each muffin tin, then bake for about 20 mins until a toothpick comes out clean! 

Then enjoy! We sure have been :) happy baking!  

IMG_5691.JPG

Shredded BBQ chicken (Instant Pot!)

I have been singing the praises of the instant pot ever since my hubby got it for me for Christmas. It has literally transformed meal prep, helped us eat out WAY less, and makes cooking at home so much easier! I’ve been making shredded chicken almost weekly, so I wanted to share a super easy rendition with you all! 

IMG_4029.PNG

Shredded chicken is so versatile! I’ve been making it with salsa verde, but also adding BBQ sauce to it as well, which means you can add it to salads, wraps, sandwiches, or just eat it plain!

And the best part is that you can use frozen chicken, make it taste super moist and fresh, and you don’t have to defrost the day before and make sure you plan ahead! You can just straight up throw frozen chicken into the instant pot and have a meal ready in less than 30 minutes. Here’s the super easy recipe! 


Makes 6-8 servings  

8 frozen chicken tenderloins

2-3 frozen chicken thighs  

1 cup chicken broth  

1 cup bbq sauce of choice  


Place the frozen chicken into the IP, along with the broth. Cover and set to sealing, then cook on manual for 22 minutes. Let the pressure release naturally for about 10 mins; then quick release.  

Once the pressure releases, take the chicken out of the IP and place in a bowl. Shred the chicken with two forks, then add the BBQ sauce and mix thoroughly! 

And that’s it! Super easy to throw together and it tastes delicious! Hope y’all get to try this recipe and seriously, if you don’t have an instant pot, go get one TODAY! They are life changing!  

Easiest Banana Nut Bread

If you know me, you know I LOVE to bake. But, the recipe must be easy, I don't like multiple steps or ingredients. I made this banana bread yesterday on a whim because I had 4 brown bananas that were headed to the trash but I desperately didn't' want to waste. The bread turned out PERFECT, and even my husband went nuts over it, and he isn't' really into baked goods (don't even get me started, I just don't understand how anyone could NOT love baked goods).

FullSizeRender.jpg

I shared this recipe over on my Facebook page but I thought I’d write it up in a blog post for future reference as well! It was so easy, so if you have any pancake mix and brown bananas lying around, get ready for the best banana bread of your life! 

IMG_3612.JPG


4 mashed bananas (the browner the better!)

2.5 cups gluten free (or regular) pancake mix...I used the Trader Joe’s gluten free pancake mix

2/3 cup coconut sugar

1 cup almond milk

2 eggs

1 tsp cinnamon

1/4 cup chopped pecans


Mix all that goodness together, pour into a greased bread pan, and bake on 350 degrees for about an hour! Enjoyyyyyy!

IMAGE.JPG

After having one slice, I realized they were just too huge, so I cut them in half. So perfect and delicious! I hope you enjoy! 

Easy Roasted Vegetables

IMG_2363.PNG

If there's one thing that I always like to have on hand are ready to eat vegetables. I typically love raw vegetables, but there is something so comforting about roasted and warm veggies during the winter time (even though our weather here has been far from winter weather, but I digress).

I decided to roast up some vegetables on Tuesday to eat with some turkey marinara I whipped up. I boiled whole wheat noodles for Emma, my hubby, and a dear friend from church who came over for dinner! Since I'm gluten free, but don't really like a lot of gluten free noodles out there, I thought I'd try the marinara over roasted vegetables, and it turned out SO GOOD! Here is the recipe for a quick and simple roasted veggies pan that you could use as a side to any meal...breakfast, lunch, or dinner!

Easy Roasted Vegetables

1 package butternut squash (I used the Trader Joe's precut one and chopped it up even smaller)

2 cups Brussels sprouts, halved

2 zucchinis, chopped*

3 tablespoons olive oil

1 tablespoon balsamic vinegar

1/2 tablespoon dried basil

1/2 tablespoon garlic powder

salt and pepper to taste

*And really, you could add any vegetables to this! Bell peppers, onions, eggplant, the stage is yours!


1. Preheat the oven to 400 degrees.

2. Chop up all your vegetables and place on greased baking sheet.

3. Mix the oil, vinegar, and spices separately, then pour over the vegetables and toss until they are all evenly coated.

4. Bake for 25-30 minutes until the veggies are crisp and starting to brown.

5. Enjoy!

See? Super simple and now you have zero excuses as to why you can't eat your vegetables! :)

Paleo Pizookie!

I have been loving making Danielle Walker's Real Deal Chocolate Chip Cookies as a way to still enjoy treats in my gluten free lifestyle. But lately, my baking sheets have been burning the bottoms of every cookie I bake! I finally got an AirBake pan today which I have heard amazing things about so I can't wait to use it! But yesterday, I was craving the cookies before I had the magic cookie sheet, so I decided to tweak the recipe a bit and make the cookies into more of "cookie bars." They taste just like a pizookie when you add ice cream on top and are absolutely delicious!! Here's the recipe!

IMG_1457.JPG

Makes 12 bars

1/3 cup coconut oil

1 egg

1/2 cup coconut sugar

1 tsp vanilla extract

1.5 cups almond flour

1 T coconut flour

1 T arrowroot starch

1/4 tsp salt

1 tsp baking powder

1/4 cup chocolate chips


Preheat your oven to 325 degrees and grease an 8x8 baking dish.

Cream together the coconut oil, egg, sugar, and vanilla extract until smooth.

Then add the flours, salt, and baking soda.

Fold in 1/4 cup of chocolate chips.

Pour into the baking dish and pat until it is even all around. Bake for 20 minutes or until a toothpick comes out clean!

Let it cook for about 20 minutes, then enjoy with some dairy free ice cream or just as is!!