Healthy Carrot Cake

Hello everyone and happy Tuesday! I have a new recipe for you all today and, surprise surprise, it's something BAKED! What can I say, I just love making my favorite baked goods healthier so I can enjoy them! :) My dad is a huge carrot cake fan so I decided to do our own little rendition of carrot cake! This recipe came out tasting great, moist, and delicious! It is also gluten-free, high in protein, and full of one of my favorite vegetables, carrots! Carrots are filled with vitamins and antioxidants that are so healthy for us and help fight certain cancers and improve our eye sight! I hope you all get to try this recipe soon!

Carrot Cake (makes one 8x8 dish, or 16 squares)

3/4 cup Pamela's Gluten Free Pancake and Baking mix

1/4 cup almond flour

2 scoops vanilla protein powder

3/4 cup baby carrots

1/2 cup liquid egg whites

1/2 cup unsweetened applesauce

1 T olive oil

2 T chopped walnuts

1/2 T cinnamon

1/2 T nutmeg

16-18 packets stevia

1/2 cup water


Preheat the oven to 350 degrees and spray your dish to pour the batter in.

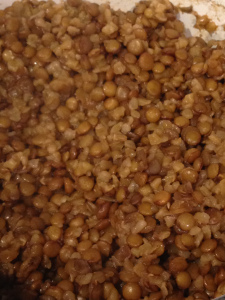
The first thing I did was place the baby carrots in my ninja chopper. A food processor would work for this step as well!  

Pulse the carrots in the food processor until they reach a grain-like consistency, like rice.

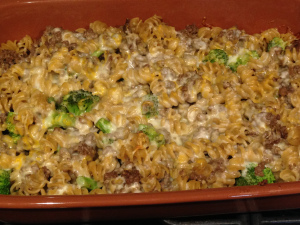
Mix the rest of the ingredients together and add the water until the mixture becomes like a batter. Pour the batter into the pan and bake for 30-35 minutes, or until a toothpick comes out clean!

And here is the finished product! I just love my baked goods so much! :) They taste great and also allow me to enjoy the deliciousness of my favorite foods without the added sugars and butters that most of them contain. There are so many varieties that you can try (check out my other recipes!) to make any of your favorite baked goods healthier! I hope you all get to enjoy this yummy and nutrient-dense cake! Nutrition facts are below:


1 square: 70 calories, 2.5 g fat, 5.5 g carbs, 5g protein, 13% daily need of Vitamin A!

Zucchini Stew

Last night, my mom and I cooked one of my all-time favorite comfort foods. My family makes an amazing zucchini stew that is usually served over rice, but since adopting a more grain-free diet, I've eaten it just by its lonesome without the rice, and have never looked back! I don't even miss the rice because the zucchini, beef, and tomato sauce give so much flavor to this dish that is still tastes delicious even on its own. It is the perfect bowl of comforting nutrients, which is why I put it on the menu for last night! I wanted to make a meal that was warm, nourishing, and that would make enough for leftovers for me to take to my first day of work today! This meal was just that!

Adjustments.jpeg

Zucchini Stew (makes 6 servings)

2 T olive oil

1 cup diced onions

1 lb ground beef (we used the grass fed 85/15 from Trader Joe's)

6 medium-sized zucchini

1 15 oz diced tomatoes

3 T tomato paste

1 t salt

1/2 t red pepper

1/2 t black pepper

1/2 t all spice


Start by heating up the olive oil in a large pot over medium heat. Add the onions and sauté until the onions are tender and translucent. Add the ground beef and chop it up into tiny pieces until it is cooked through.

While the beef is cooking, wash and slice up your zucchini into thin disks!

Once the meat is cooked all the way through, add the zucchini, diced tomatoes, tomato paste, and seasonings! Mix all the ingredients together, then leave the pot over medium heat, covered, for about 1 hour, stirring every 10-15 minutes. There should be enough liquid in the pot since zucchini release a lot of moisture, but if the mixture ever gets dry, add a bit of water to it!

Once the zucchini cooks through and gets mushy, the dish is done! It should resemble a stew-like consistency.

We thoroughly enjoyed this meal last night; my parents added rice to theirs, but I enjoyed the stew as is! I hope you all get to try this dish this winter; it's perfect for cold and cozy nights! Not to mention it is gluten/grain free, paleo, and Whole 30 approved!

Broccoli Chicken & Cheese Casserole (lite!)

Well, it's Monday morning again, which means my Sunday was full of Super Bowl fun and some night time meal prep! I was pretty exhausted after coming home from my Super Bowl party, so I wanted to whip up a quick and easy dish that I could take to work with me for a few days. I made a very easy and low maintenance version of Creamy Broccoli Chicken and Cheese, without the cream! I never liked creamy dishes growing up, but I do love cheese so I decided to lighten up this usually heavy dish! Here is my recipe for Broccoli Chicken and Cheese Casserole! 

Makes 4 servings:

2 cups raw broccoli

1/2 cup uncooked brown rice (can be omitted if you want, just add extra veggies and chicken!)

1 1/3 cup water

1 container Lemon Pepper Chicken Breast from Trader Joe's (or 12 oz chicken breast any way you like...I just was short on time so used my trusty and yummy TJ's chicken!)

1 cup lite shredded mozzarella cheese (or cheddar if that's your thing, I'm just not a fan!)


Start by steaming the broccoli. I usually just place it in the microwave with a few drops of water on top, but if you have a steamer you can use that as well!

Then, cook the brown rice. I used 1 1/3 cup water for my 1/2 cup of brown rice (remember that brown rice needs a bit more water than white rice!) Bring the water and brown rice to a  boil, then simmer for about 10 minutes.

Add the cooked broccoli to the cooked brown rice, then turn the burner off.

Cook your chicken, then dice it up into little pieces! Add the chicken to the brown rice and broccoli and stir together.

This is where some creativity came into the mix, brought to you by my boyfriend. I added the shredded cheese to the pot, but wanted it to melt evenly throughout the pot. My boyfriend suggested making it into a casserole, which I thought was perfect! I sprayed an 8x8 glass dish and poured the rice, broccoli, chicken, and cheese mixture into it, making sure the cheese was evenly distributed. I baked the casserole on 350 degrees for about 10 minutes, just enough for the cheese to melt. You could also wait till the end to add the cheese and sprinkle it on top of the casserole before placing it in the oven to get the cheese to brown up on top! I just wanted it to melt, which ended up looking like this!

And there you go! This meal is perfect to cut up into squares and take to work or school!

I paired my meal with a nice salad filled with veggies and some olive oil dressing. This was SUCH a quick and easy recipe, filled with protein, fiber, and tons of vitamins, which will leave you feeling great. Hope you all enjoy!


Nutrition facts: 1/4 of recipe

235 calories, 6g fat, 20g carbs, 26g protein, 25% DV Vitamin A, 65% DV Vitamin C, 22% DV Calcium!

Mujedereh (Bulgar and Rice)

Happy Monday everyone! I don't know about anyone else, but the time change really hit me hard today! But not until about 10am. I still woke up at 5am per usual, went to the gym, got ready, headed to work, and felt super energized! Until 10am hit...and then I felt like I just wanted to find the nearest bed and knock out! Thank God I made it through the work day and finally got home! My mom made one of my favorite dishes for dinner tonight, so I thought I'd share it. It's called Mujedereh but it is basically a type of lentil rice, but with bulgar wheat! Bulgar has a ton of fiber and nutrients, and pairing it with the lentils makes this a nutritious and filling meal! You can also substitute the bulgar with rice or quinoa to make this gluten free! I've tried both versions in addition to the original one and all taste incredible! Mujedereh (makes 5-6 servings)

1 cup lentils

1/2 cup bulgar

3 cups low sodiumchicken broth

salt to taste

1 tablespoon olive oil

1/2 cup sliced onions

2 T pine nuts


Start by bringing the chicken broth to a boil. Add the lentils and cook for about 20 minutes, or until the lentils are soft. Then, add the bulgar, cover the pot, and let the lentils and bulgar cook together for another 20 minutes, or until the mixture is mushy and soft. Add salt to taste.

While the lentils and bulgar are cooking, heat up the olive oil in a skillet. Add the sliced onions and pine nuts and sauté until they are browned. Once everything is done, serve up the Mujedereh and top with the sautéed onions and pine nuts!


And that's it! This is a pretty simple recipe that is easy to make and is great for leftovers! Have a great night everyone!

Oatmeal Breakfast Biscuits

Before limiting my gluten intake, I used to love spreading peanut butter on whole grain toast or tortillas as a pre workout meal. I looked forward to it nearly every morning! Well now, I have a gluten-free option for this as well! These oatmeal biscuits are healthy and delicious and are perfect for spreading peanut butter, jam, or anything else you may want to! They taste great fresh out of the oven and can be reheated in the toaster for a few days after!! Here is my recipe for Oatmeal Breakfast Biscuits!  

Makes 9-10 biscuits

3/4 cup gluten free pancake and baking mix (I use Pamela's...the BEST!)

1 cup gluten free rolled oats

1/4 cup almond flour

2 scoops vanilla protein powder

1/2 cup applesauce

1 whole egg

1 t cinnamon

1 t vanilla extract

stevia if desired


Preheat the oven to 350 degrees. Mix the dry, then wet ingredients into a mixing bowl. The batter should resemble a muffin-type drop batter consistency.

Drop the batter onto a lined and sprayed cookie sheet. Make sure to leave enough room between the biscuits because these spread!!! Bake for 20-25 minutes or until a toothpick comes out clean. These turned out sooooo huge and unbelievably delicious!

I stored them in a tupperware container and have been reheating them in the mornings in my toaster, then spreading some peanut butter on top! YUM-O!

I hope you all get to try this recipe soon! It's easy, delicious, and the perfect pre workout treat!!!

Nutrition facts per biscuit: 125 calories, 4g fat, 17g carb, 8g protein

*Don't fear the fat people! It comes from the egg and almond flour...both good sources!! :) And the combination of fat, protein, and carbohydrate in this biscuit makes it the perfect fuel before your workout! I hope you all get to try out this recipe soon! Have a great Monday!

Cajun-style Chicken & Rice

The creation of this recipe was one of those "throw-everything-in-the-pot-and-hope-it's-delicious" type of experiences...and I was definitely NOT disappointed! And the best part...it only took 30 minutes to put together! I was in a huge rush on Monday morning to put together a meal that would last me the week for lunches at work. I usually do my meal prep Sundays, but since I had quite a busy weekend (I got engaged woooo!), I had to scrounge something up on Monday morning. I had bought some of my favorite prepared lemon pepper chicken from Trader Joe's, and definitely wanted to use it in a meal that would not only taste great but would make an easy lunch for the week! This recipe was so simple and delicious, I'm excited for you all to try it! Here is my Cajun-style Chicken & Rice Recipe!

Makes 4 servings:

1 package Lemon pepper chicken (or about 12 oz of cooked chicken)

2 Spicy Jalapeño Chicken sausage links

1/2 cup uncooked brown rice

1 1/4 cup water

1 cup broccoli

1/2 cup chopped bell pepper

1/2 cup sugar snap peas

1 T olive oil

1-2 t cajun seasoning (or to taste)

1 t garlic powder

1/2 t salt


Start by cooking your chicken. The lemon pepper chicken cooks easily in the microwave, just follow the instructions on the package! Once your chicken and sausage is cooked up, chop them up. Meanwhile, sauté the snap peas and peppers with the olive oil over medium heat. I steamed my broccoli. While you are cooking your veggies, cook the brown rice according to the instructions. I used 1/2 cup dry rice with 1 1/4 cups water. Once the rice is cooked, add the veggies to the pot!

Add the sausage and chicken to the pot as well.

Once all the ingredients are mixed up, you can add the cajun seasoning, garlic powder, and salt. I used the Cajun seasoning from Whole Foods that my cousin bought me...it's my favorite!

Mix the seasonings throughly, and then you are done! The smell of this meal was so amazing!

This recipe provides the perfect mix of nutrients: protein, healthy carbohydrate, veggies, fiber, vitamins, minerals, and healthy fat from the olive oil! Check out the nutrition facts below!

1 serving (about 1 cup): 280 calories, 10g fat, 23 g carbs, 26 g protein, 90% daily need for Vitamin C!

I hope you all get to enjoy this dish soon! It was prepped in 30 minutes, has been making the perfect lunches for my week, is healthy, and most importantly, IT IS DELICIOUS! :)

I wish you all a happy Wednesday!!!

Eggplant and Zucchini Marinara

I thought I would share a recipe I whipped up last night. It's a random combination of foods but came out tasting great! I am calling it Eggplant and Zucchini Marinara with Lentils! I had some eggplant and zucchini in the fridge that I didn't want to go back...plus half a jar of marinara sauce. So I got working in my kitchen!

First, I chopped up my eggplant and a bag of mini zucchinis I got from Trader Joe's...if you have normal sized zucchini, you would only need about 3-4! After chopping them up, I steamed them on my stovetop. While the veggies steamed, I boiled 2/3 cup of green lentils in some water for about 25-30 minutes until they softened up!

Once the veggies were done steaming, I poured out all the water from underneath the steamer, then used to same pot (what can I say, I am a minimalist) to put the steamed veggies in. Then I mixed in half the jar of marinara sauce. Once the lentils were done, I drained the water and added them as well!


This dish turned out so warm, delicious, and filling! It's so easy and quick and is perfect to make in bulk to take to school or work with you!

Spanish Rice

My husband is a huge rice lover. I mean he will eat it every day for every meal and not get bored. Spanish Rice, Asian rice, rice pilaf…he doesn’t discriminate. But one of our favorites is definitely Spanish rice. I’ve always been intimidated by it and usually leave it to our favorite Mexican restaurants. BUT, in an effort to eat out less and eat homemade food more, I experimented a bit and finally came up with the perfect recipe! My husband couldn’t get enough of it, so that’s a win in my book! 

Spanish Rice (makes 6-8 servings…cook in bulk, it’s so much easier!) 

2-3 T olive oil 

1/2 medium white onion 

1/2 medium green bell pepper 

2 cups rice 

2, 8 oz cans of tomato sauce 

5 cups chicken broth (or veggie broth or water) 

2 tsp salt 

1/2 tsp garlic salt 

1/2-1 tsp red pepper (depending on how spicy you want it!) 

A dash of cumin (probably 1/4 tsp…not much!) 
Start by heating up the oil in a pot. Chop the onion and bell pepper finely, the smaller the better! Saute the onion and bell pepper in the oil until they are nice and soft. Then add the rice, and saute that in the oil as well, just for a minute or so.

Add the tomato sauce, water/broth, and spices. Mix well and bring everything to a boil, then let the rice simmer on low heat for 35-40 minutes, or until all the water disappears. It’s a slow and steady process, but this is what makes the rice sticky and so restaurant-like! Then, enjoy! 

We served ours with some tilapia, but I’ve also made it with a side of carne asada or chicken. You could even add black beans on top and turn it into a beans & rice bowl! So versatile! 

Hope y’all enjoy this recipe! Happy Wednesday! 

Macaroni & Cheese Casserole

Last night, I decided to make my fiancé a macaroni and cheese dish we had been brainstorming together. He LOVES anything mushy, warm, cheesy, and, of course, yummy! He is a big fan of comfort food. I wanted to make him a dish he would like, while making it semi-healthier than the typical macaroni and cheese dish. This recipe tasted much lighter than other similar recipes and left us feeling full without feeling gross. I was so happy with the way this dish turned out, and I hope you are too! 

Macaroni and Cheese Casserole (serves 8)

*4 cups whole wheat fusilli pasta

*1 lb lean ground beef

*1 T olive oil

*1 cup lite Alfredo sauce (I used Bertolli's...it was SO GOOD!)

*2 cups steamed broccoli

*1 cup lite mozzarella cheese (separate into 2, 1/2 cup portions)

*1 cup lite Mexican cheese blend (separate into 2, 1/2 cup portions)

Start out by boiling the fusilli pasta for about 8-10 minutes, or however long it advises on the package.

While the pasta is boiling, heat up 1 T olive oil in a skillet and cook the ground beef until it is brown and in little itty bitty pieces.

Once the pasta cooked, I drained the noodles and rinsed them with water. I added the noodles back into the pot (without the water of course!) and added the ground beef. I steamed the broccoli in the microwave (what can I say, it was a Friday night!) and added that to the pot as well. I added 1/2 a cup of each kind of cheese and the cup of Alfredo sauce, and mixed it all thoroughly in the pot.

I transferred the mixture to a casserole dish (I sprayed with non-stick spray first!), and topped it with the remaining 1/2 cup of each type of cheese.

I baked it uncovered in the oven for about 20 minutes on 375 degrees, then let it broil on high for another 5-7 minutes until it got a little golden brown on top.


We let it cool for about 5 minutes, then dug right in. This recipe is supposed to make 8 servings, but we may or may not have eaten 75% of the dish!!! It was that good!


This dish pulled together in about 45 minutes and was super easy to make! I hope you all get to try it out. You can also add any type of veggies you want like kale, spinach, peppers, onions, anything! Get creative! :)


Have a happy Saturday everyone!

Sausage & Veggie Frittata

 am SO happy it's such a short week this week. It's already Wednesday! Since I have a late shift on Wednesdays, I decided to take advantage of my extra time and make a frittata that would last me for the rest of the week for breakfast! This frittata turned out so yummy and had all the usual ingredients most people would typically have in stock at home. It was also ready in under an hour! Here is my recipe for my Sausage and Veggie Frittata!  

Makes 1, 8x8 pyrex dish (about 4-6 servings, depending on how hungry you are!)

*6 whole eggs

*1/2 cup liquid egg whites (or additional 2 more eggs, I just wanted to finish off my whites!)

*2 spicy chicken sausages (I like Trader Joe's brand, but you could use any!)

*1/2 cup almond milk

*1 cup kale

*2-3 mini bell peppers

*1 T olive oil

Preheat the oven to 350 degrees. In a skillet, heat the olive oil over medium heat (on the stove top). Add the kale and peppers and sauté until soft.

While the veggies are cooking, start cracking those eggs. Add in the egg whites and the almond milk, and whisk them all together. I also microwaved the 2 chicken sausages while waiting for the veggies to cook as well. Once those are cooked, add the veggies and the chopped-up sausages into the egg mixture.

Grease your pyrex with olive oil, then add the frittata mixture.

Bake for 30-35 minutes, or until a fork/toothpick comes out clean. I waited for it to cool for about 5 minutes, then couldn't wait any longer! This frittata was SO YUMMY!


I added half an avocado and some berries and a plum to round out my breakfast. SO GOOD.

I hope you all get to try this quick, easy, and DELICIOUS frittata recipe! Have an awesome Wednesday everyone!